Grouping XML Data using Altova and Logic Apps

Altova MapForce is an excellent tool for mapping and transforming data between different formats. The tool allows business users and domain experts to manipulate data without requiring coding skills.
I had a scenario where an invoice contained thousands of lines. To make it easier to parse, we would need to consolidate on product code to reduce the length of the invoice.
In this example, I am using Altova MapForce to generate an XLST 2.0 mapping function and deploying this into an Azure logic app for use in an integration service.
As I was working on a long and advanced real-life invoice, this would not be proper to show here. This is instead an example XML:
					<Invoice>
    <Products>
        <Product>
            <Code>45585</Code>
            <Type>A</Type>
            <Description>An item of type A.</Description>
            <Price>75.00</Price>
            <ReorderLimit>100</ReorderLimit>
        </Product>
        <Product>
            <Code>45585</Code>
            <Type>B</Type>
            <Description>An item of type B.</Description>
            <Price>25.00</Price>
            <ReorderLimit>70</ReorderLimit>
        </Product>
        <Product>
            <Code>45587</Code>
            <Type>A</Type>
            <Description>An item of type A.</Description>
            <Price>65.00</Price>
            <ReorderLimit>100</ReorderLimit>
        </Product>
        <Product>
            <Code>45587</Code>
            <Type>A</Type>
            <Description>An item of type A.</Description>
            <Price>45.00</Price>
            <ReorderLimit>100</ReorderLimit>
        </Product>
        <Product>
            <Code>45585</Code>
            <Type>B</Type>
            <Description>An item of type B.</Description>
            <Price>35.00</Price>
            <ReorderLimit>80</ReorderLimit>
        </Product>
    </Products>
</Invoice>

This is fine, however I would also like to aggregate on a compound key of both “Code” and “Type”. So let’s add a concatenate statement and make that the key instead. I also want to get the sum price and the average reorder limit, so adding Sum and Average functions.

This mapping will produce the following result.
					<Invoice>
	<Products>
		<Product>
			<Code>45585</Code>
			<Type>A</Type>
			<Description>An item of type A.</Description>
			<Price>75</Price>
			<ReorderLimit>100</ReorderLimit>
		</Product>
		<Product>
			<Code>45585</Code>
			<Type>B</Type>
			<Description>An item of type B.</Description>
			<Price>60</Price>
			<ReorderLimit>75</ReorderLimit>
		</Product>
		<Product>
			<Code>45587</Code>
			<Type>A</Type>
			<Description>An item of type A.</Description>
			<Price>110</Price>
			<ReorderLimit>100</ReorderLimit>
		</Product>
	</Products>
</Invoice>
ADDING THE XSLT 2.0 MAPPING IN A LOGIC APP
Following the previous XLST logic sample, we can now create a logic flow.
First, create a new Integration Service Environment in your Azure tenant. After it has been created, go to the resource and
- click “Maps” from the overview page
- click “Add”
- set the type to “XSLT 2.0”
- browse for the XSLT file that was saved earlier
- the name is set automatically
- click OK
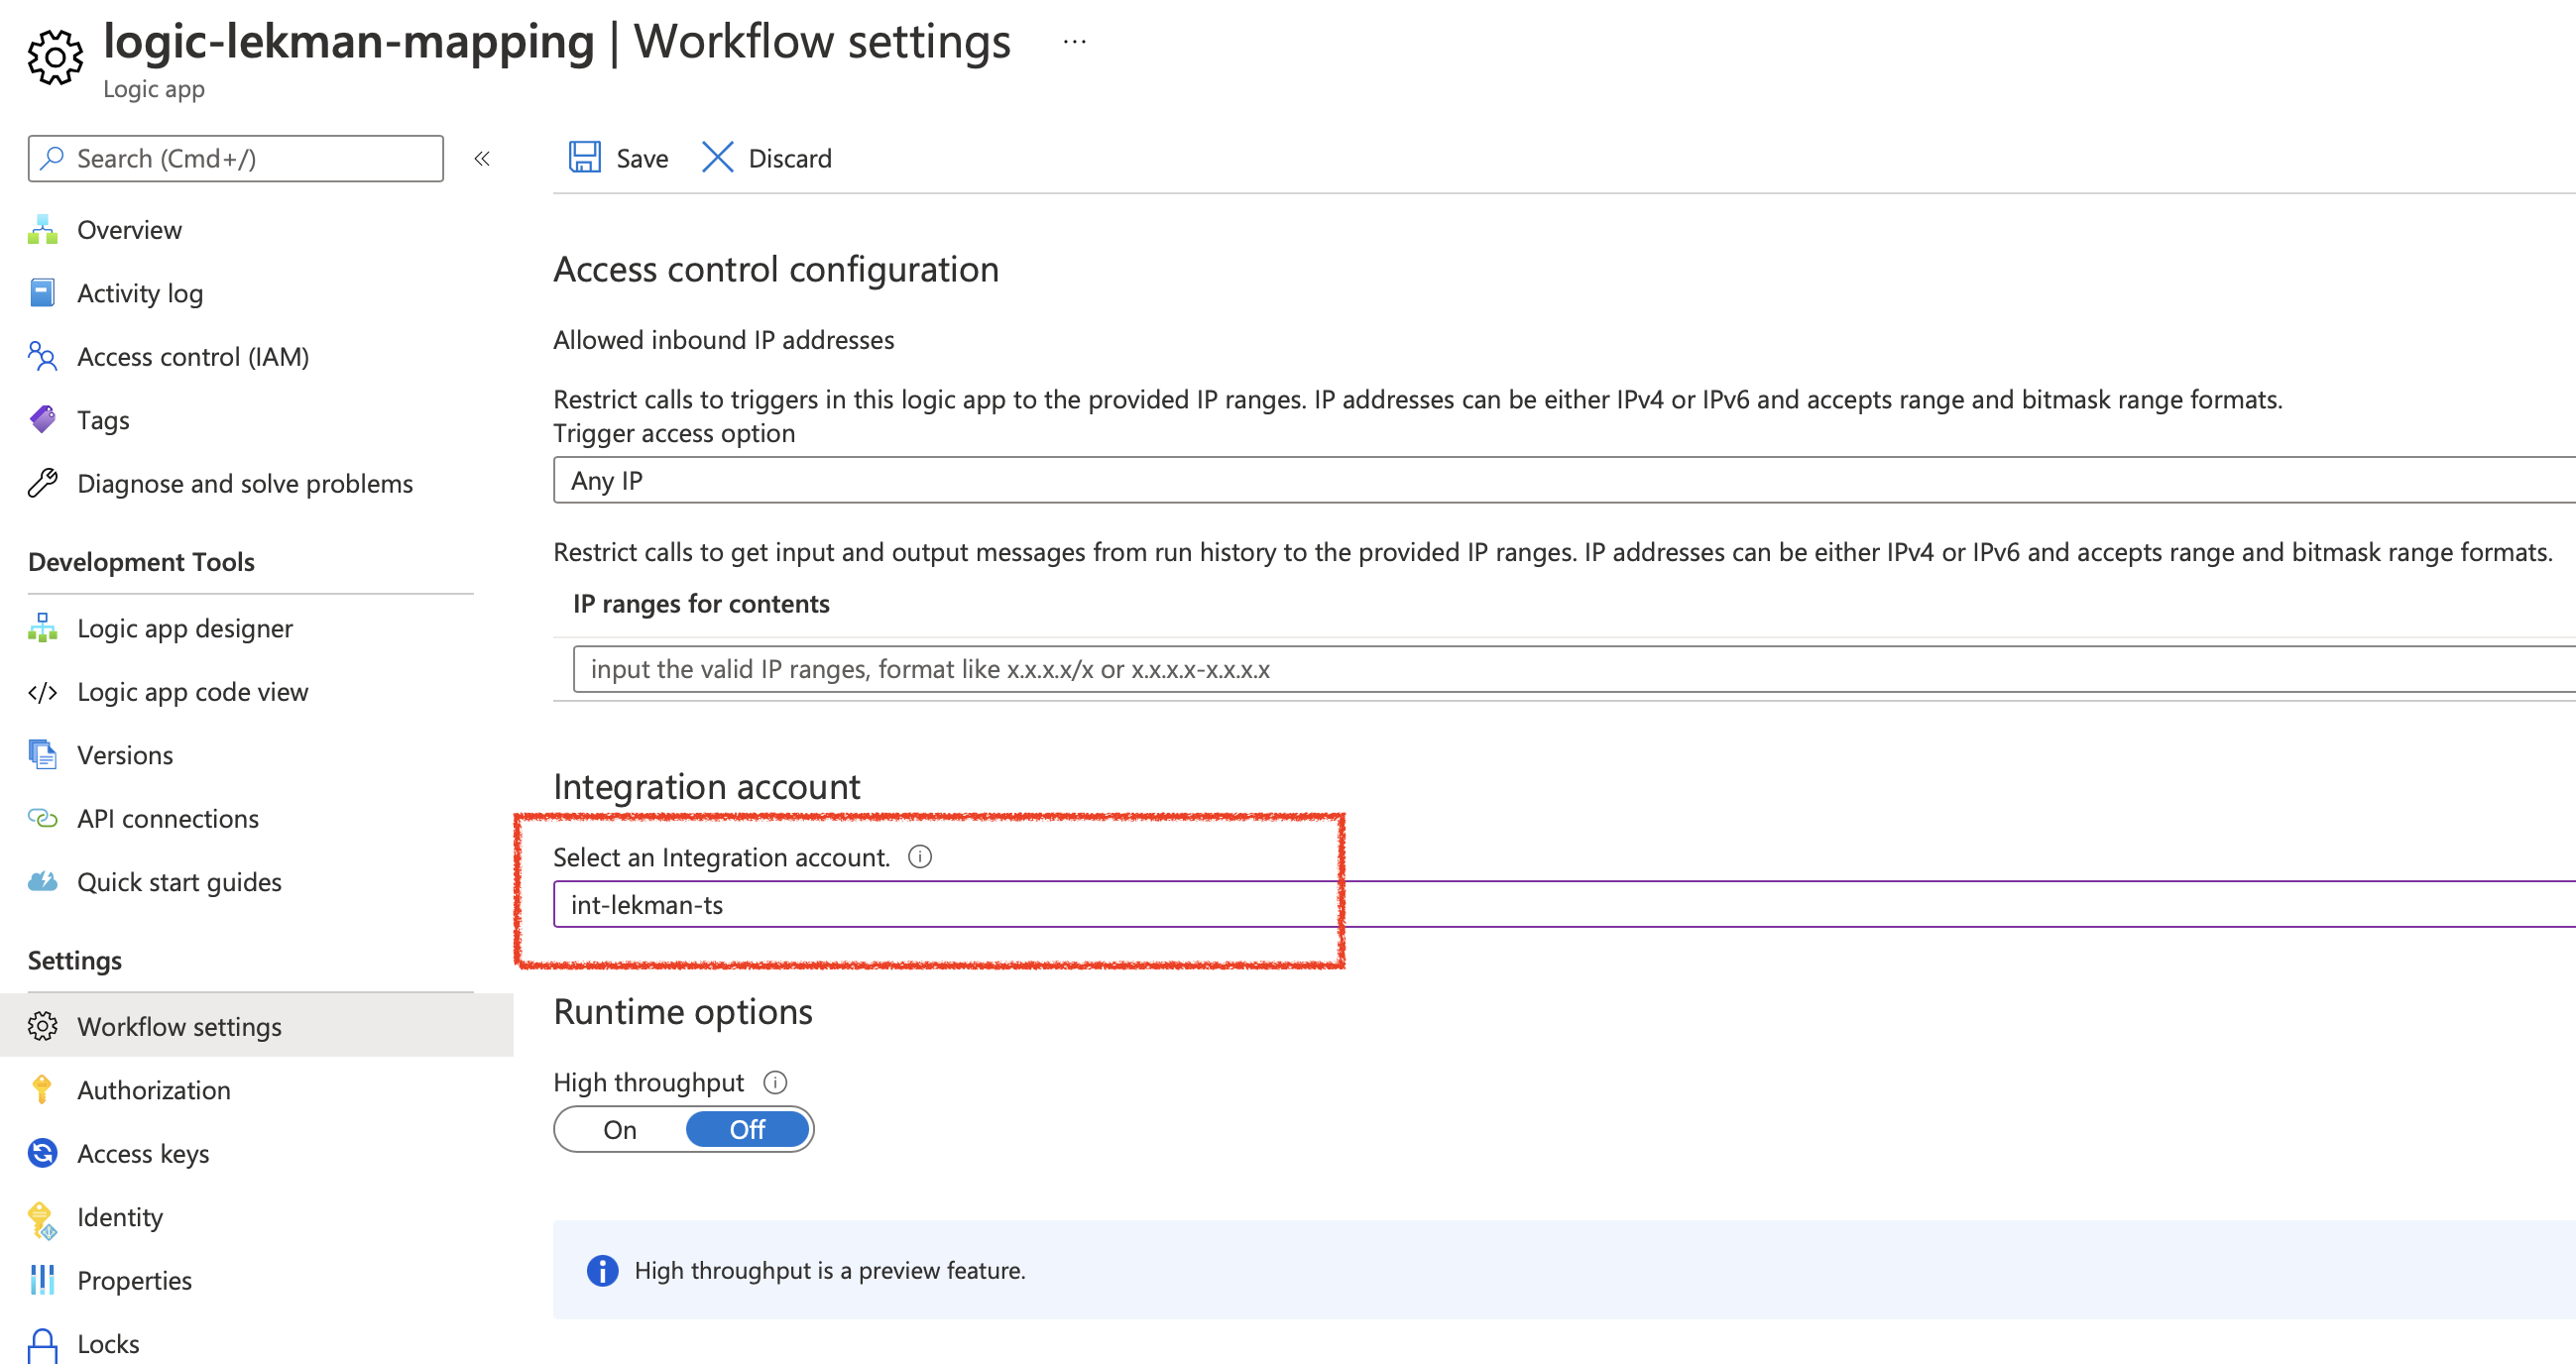
Then, create a new Logic App. This will cause the logic app designer to open, so set the activation to “When a HTTP message is received” and then save the workflow and close the editor (top right X or click the logic app name in the breadcrumbs).
Now, from the logic app blade, select “Workflow Settings” and link the new integration service.
Go back to the workflow editor (Overview, then Edit) and:
- create a new step using the component “Transform XML” under the “Built-in” section
- in “content” add the Body of the incoming HTTP message. If you can’t see it then press “see more” in the dialog
- in “map”, select the mapping you uploaded earlier
- add a new step using the component “Response” under the “Built-in” section
- add the output from the XSLT transformation into the Body field
- save the workflow
- click “When a HTTP request is received” and copy the HTTP POST URL
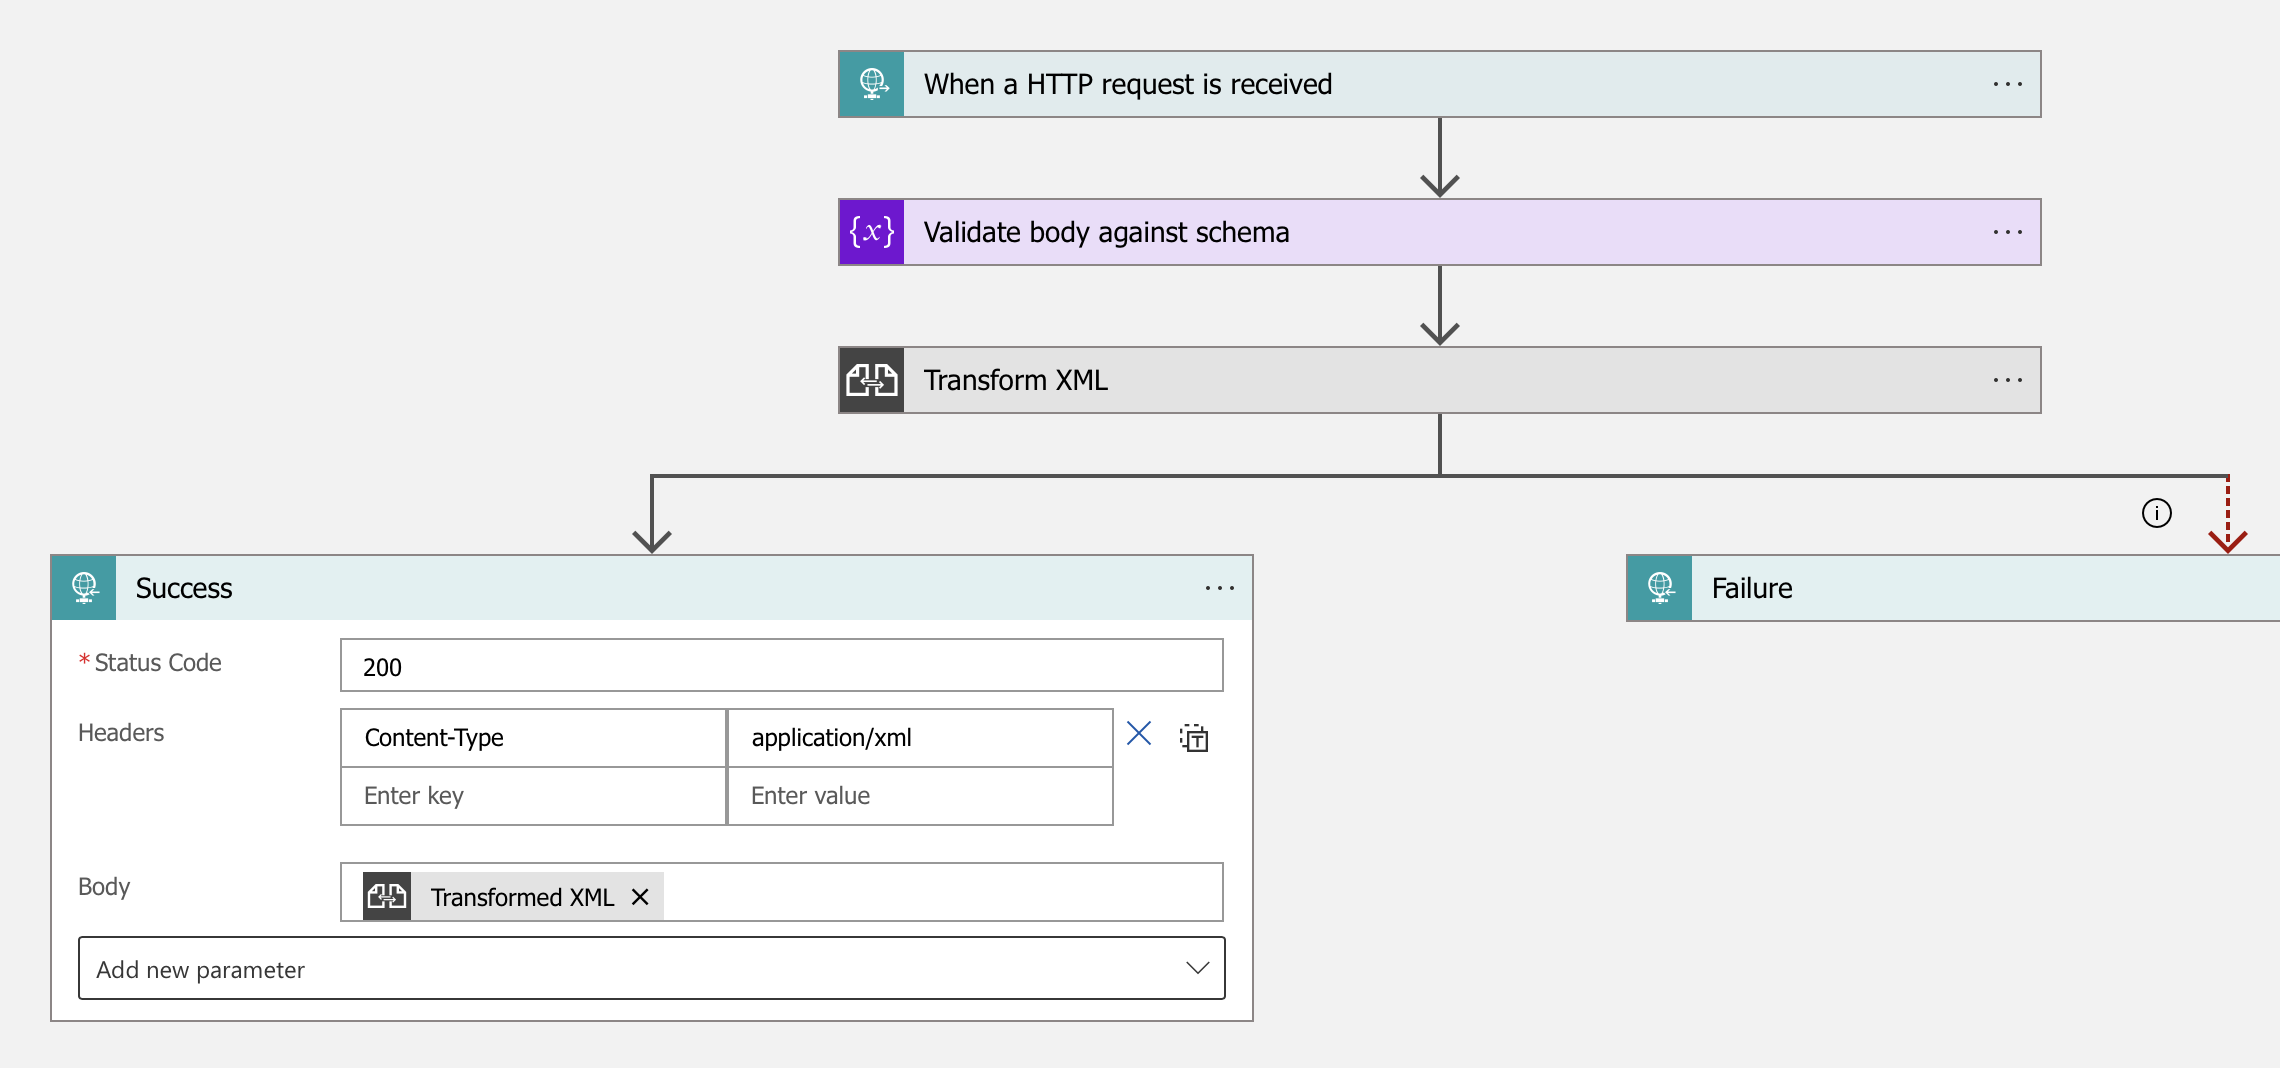
The workflow should look like this.
Now, test the workflow
- from the overview screen on the logic app, press
- install Postman
- press “New” in Postman and create a new request
- Set the method to POST and paste the HTTP POST URL into URL
- Under the Body tab, set format to Raw, use the menu to the right of these boxes to select XML then paste the invoice.xml file content into the window
Then click SEND. You should get a response now from the logic app, containing the transformed XML. The workflow run history will show the execution results if you need to troubleshoot or inspect the transformation.