Transform XML using Altova MapForce in Azure Logic Apps

Azure Logic apps has powerful capabilities when joined with an integration account. This allows us to do advanced data mapping transformations.
In this example, I will use Altova MapForce to design the mapping between the two file formats.
CREATING THE MAPPING IN ALTOVA MAPFORCE
First, download Altova MapForce and request a trial license. You can then create a sample mapping by click “Menu/Insert/XML Schema or File”. You can select a sample file from the MapForce tutorial, these are available at
C:\Users\tobias.lekman\Documents\Altova\MapForce2021\MapForceExamples\Tutorial
under your profile, so replace tobias.lekman with your username.
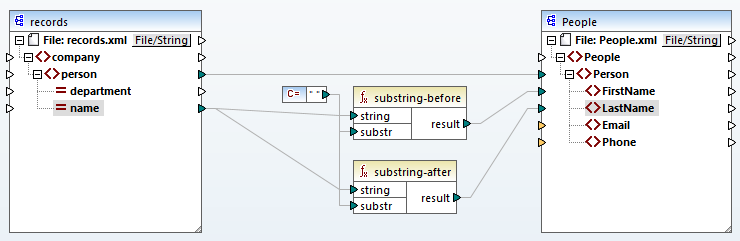
In this example, I add the file “records.xml” and then repeat the process and add the second file “people.xml”. I then
- drag the “/company/person” field from records into “/People/Person” in companies
- then right-click the workspace and select “Insert Constant”, name it ” “, as in just a space, and set it to type string
- from the left side, locate the functions substring-before and subtring-after and add them to the workspace
- drag the space constant to the field “substr” on the functions
- drag the “/company/person/name” to “string” in both functions
- drag the result of the substring-before function to “/People/Person/FirstName” in people.xml and substring-after to “/People/Person/LastName”
- validate by clicking the “Output” tab
The logic should look like this:
Now, use “Menu/File/Generate code in…/XSLT 2.0” and save it to disk, by selecting Desktop and press save.
SETTING UP LOGIC APP AND INTEGRATION SERVICE
First, create a new Integration Service Environment in your Azure tenant. After it has been created, go to the resource and
- click “Maps” from the overview page
- click “Add”
- set the type to “XSLT 2.0”
- browse for the file that was saved to your desktop
- the name is set automatically
- click OK
Then, create a new Logic App. This will cause the logic app designer to open, so set the activation to “When a HTTP message is received” and then save the workflow and close the editor (top right X or click the logic app name in the breadcrumbs).
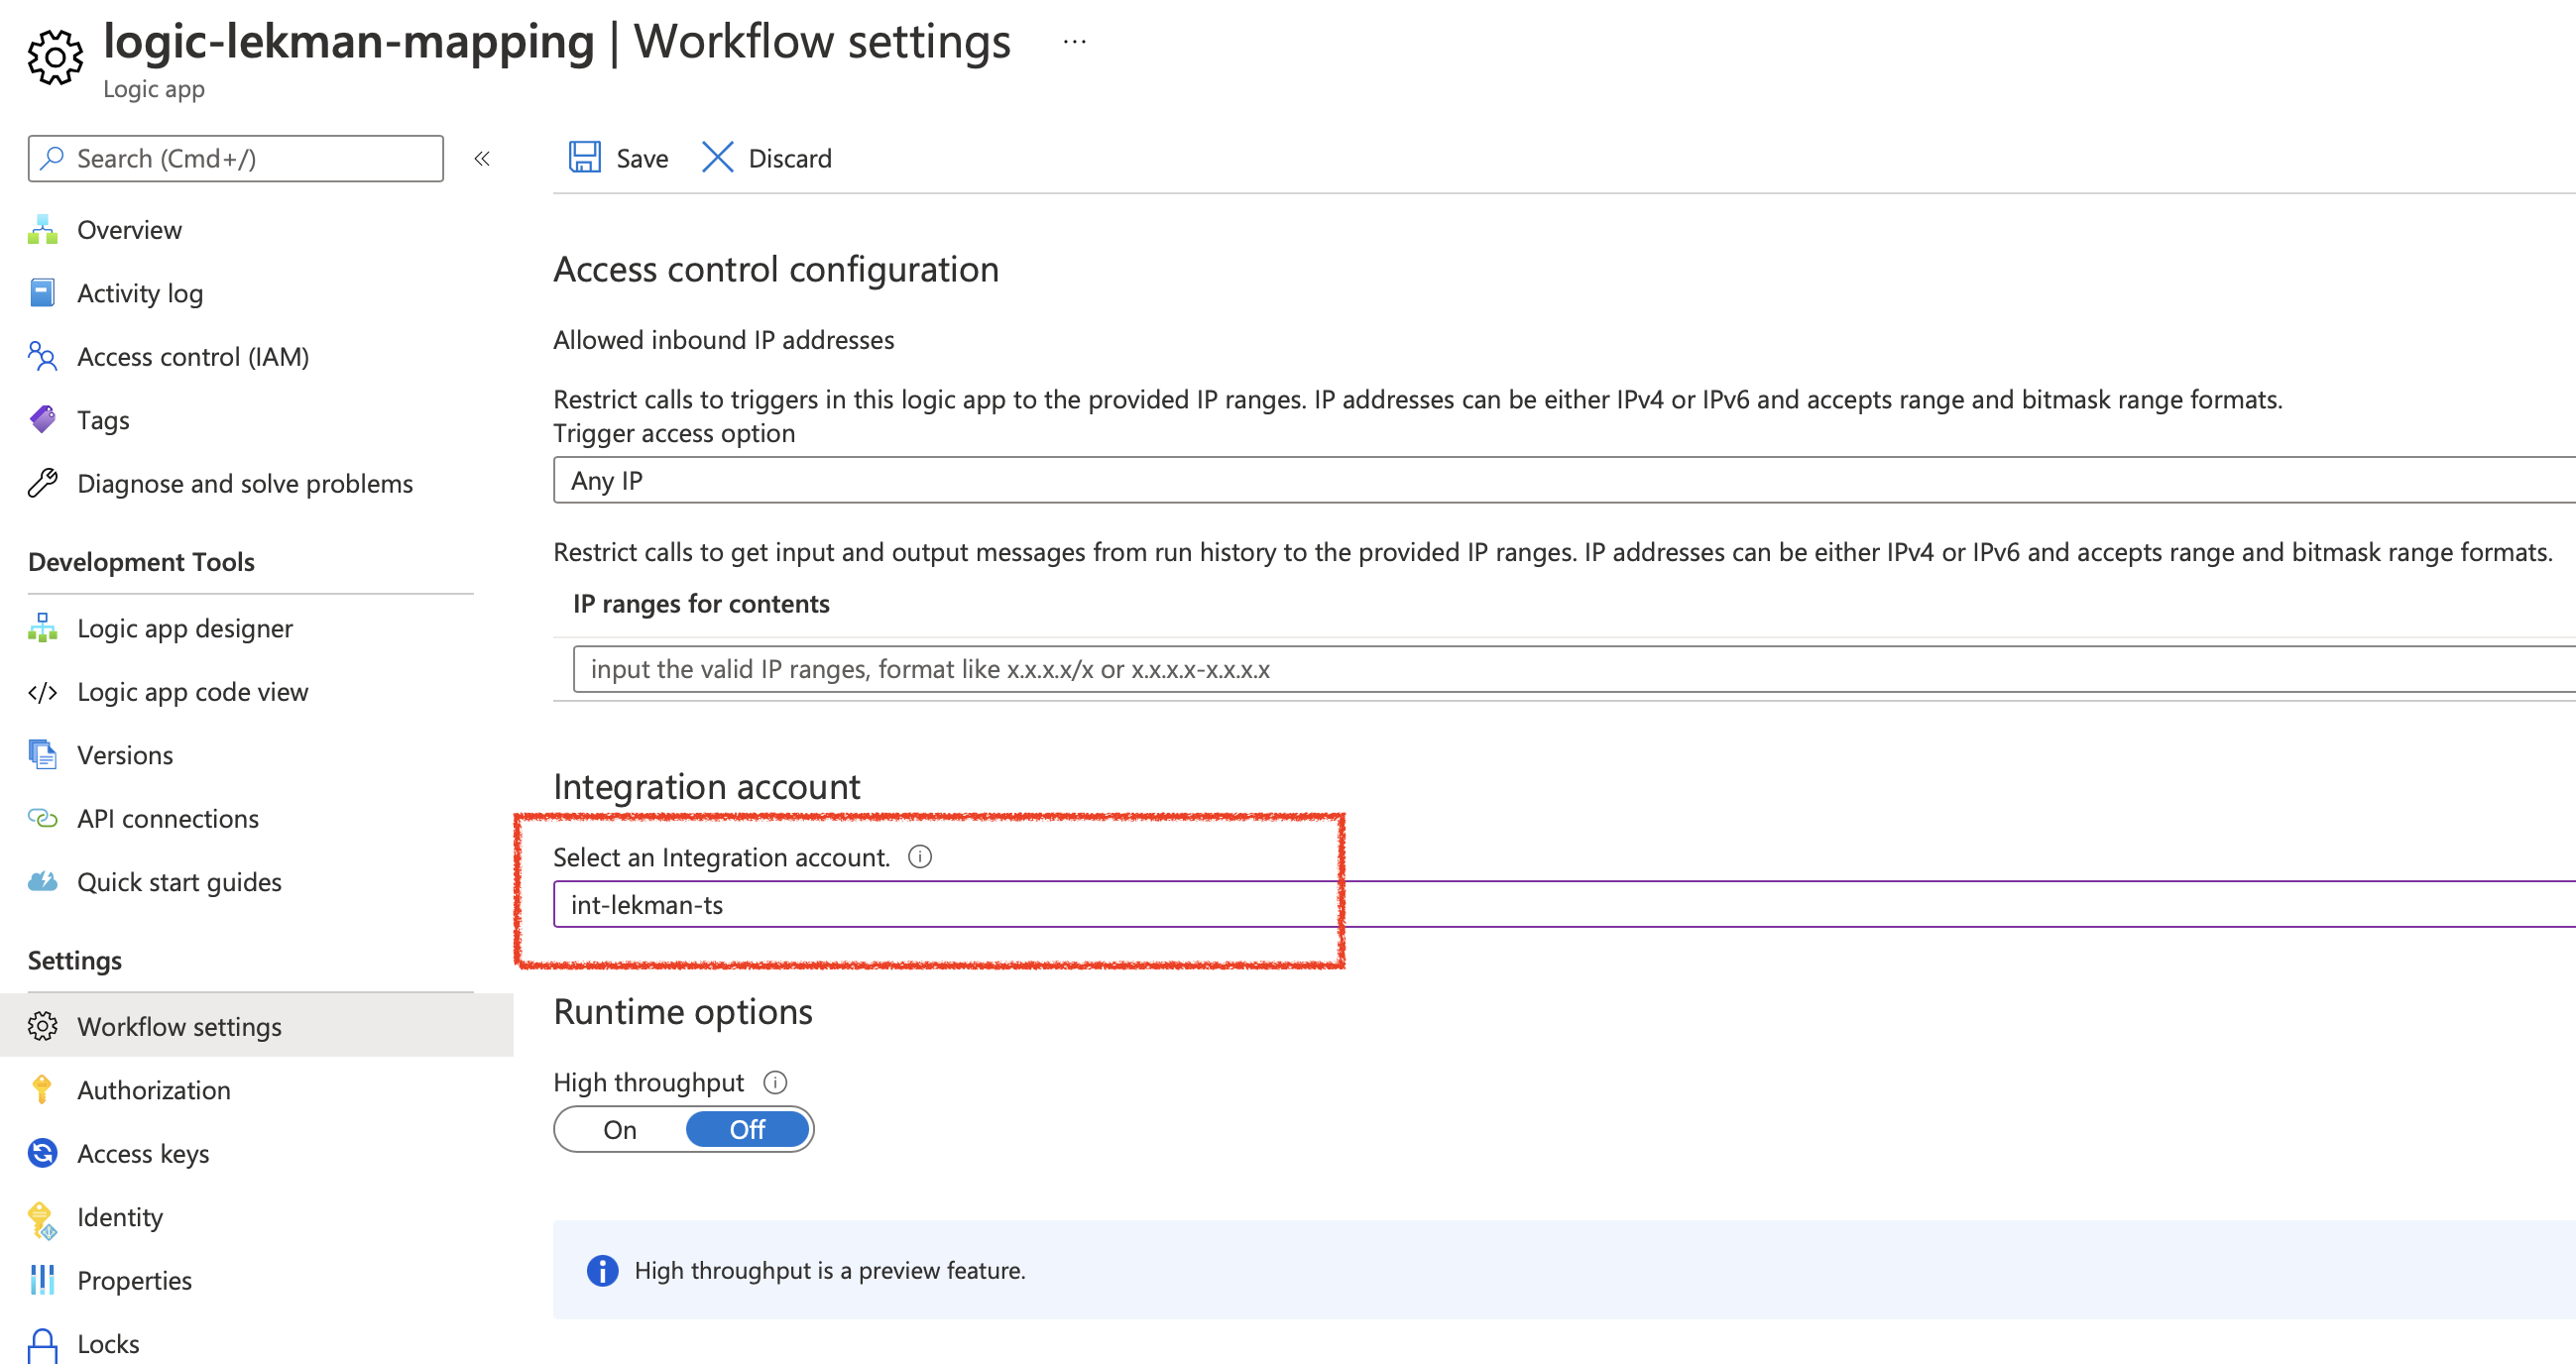
Now, from the logic app blade, select “Workflow Settings” and link the new integration service.
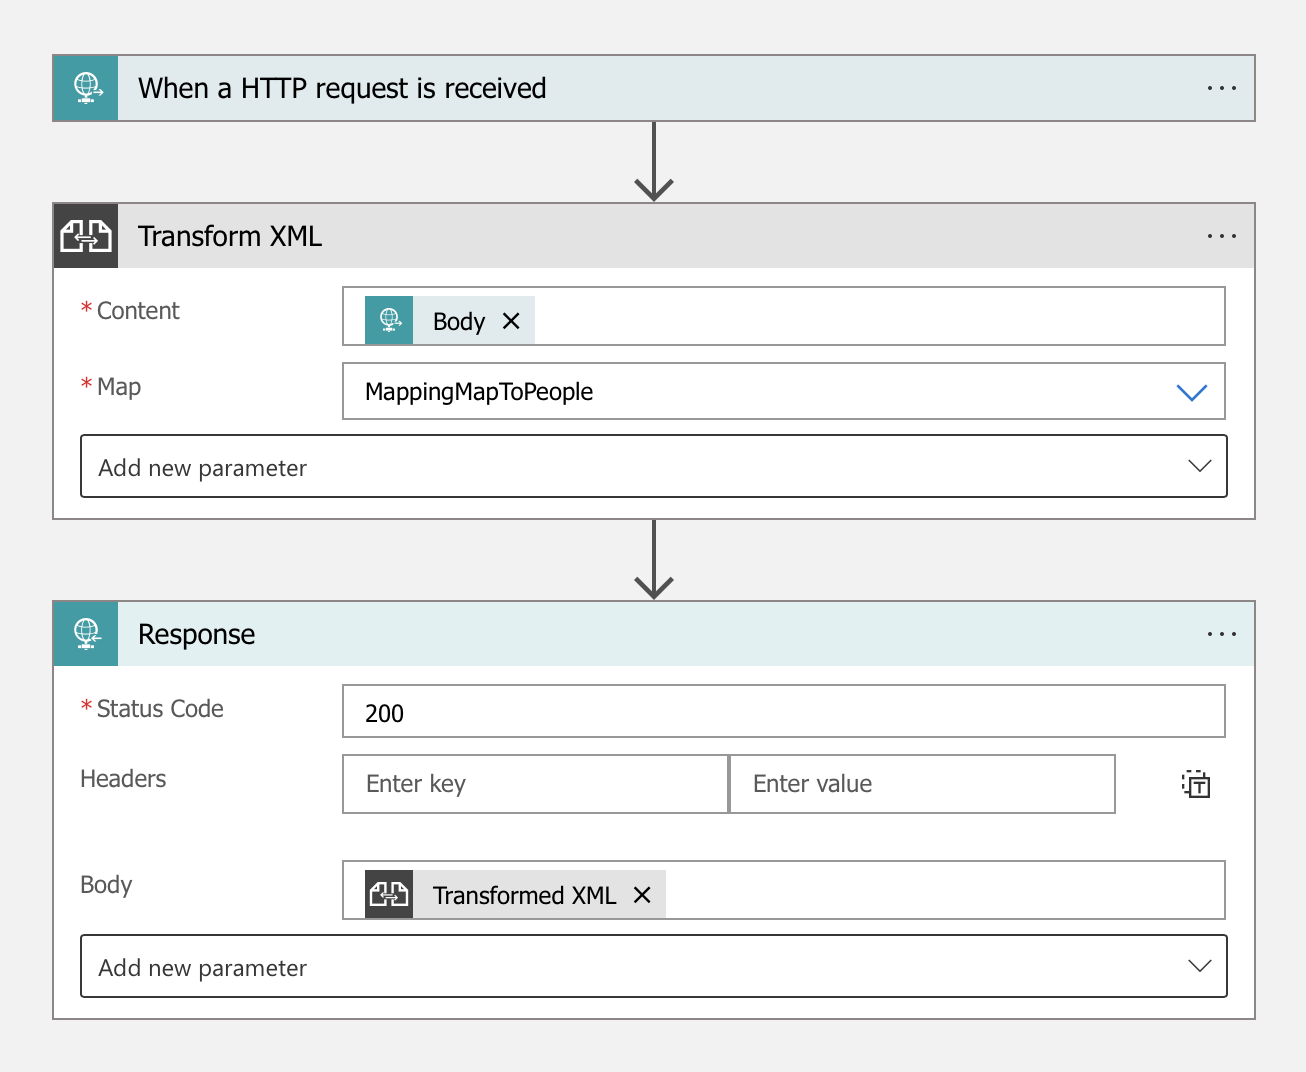
Go back to the workflow editor (Overview, then Edit) and:
- create a new step using the component “Transform XML” under the “Built-in” section
- in “content” add the Body of the incoming HTTP message. If you can’t see it then press “see more” in the dialog
- in “map”, select the mapping you uploaded earlier
- add a new step using the component “Response” under the “Built-in” section
- add the output from the XSLT transformation into the Body field
- save the workflow
- click “When a HTTP request is received” and copy the HTTP POST URL
The workflow should look like this.
Now, test the workflow
- from the overview screen on the lofic app, press
- install Postman
- press “New” in Postman and create a new request
- Set the method to POST and paste the HTTP POST URL into URL
- Under the Body tab, set format to Raw, use the menu to the right of these boxes to select XML then paste the people.xml file content into the window
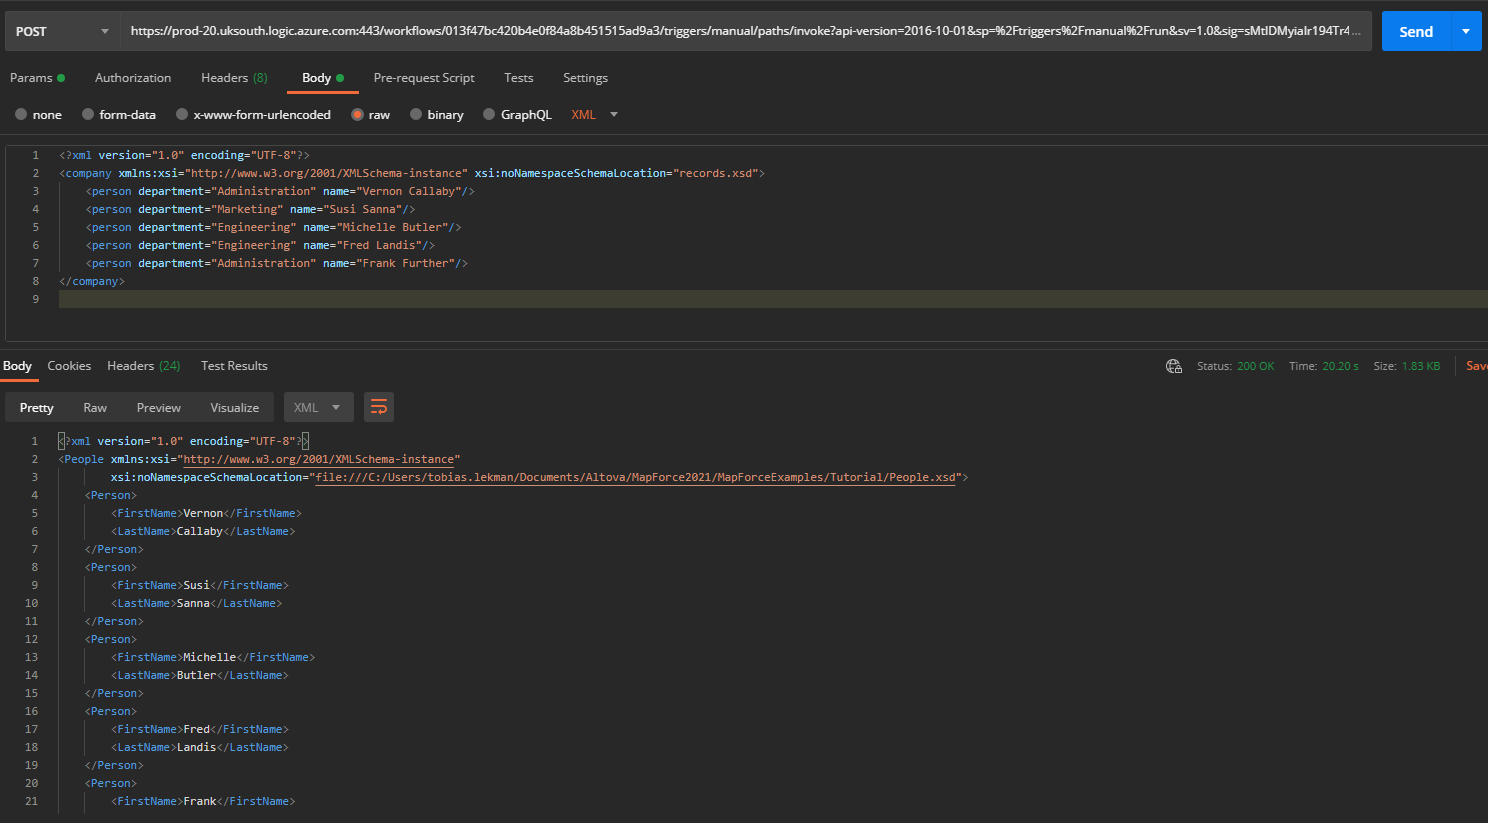
Then click SEND. You should get a response now from the logic app. The workflow run history will show the execution results.
